Foscam cameras (Deprecated)
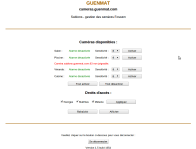
This web interface allows remote Foscam cameras administration:
• activate / deactivate alarms
• manage access rights
• and display camera views.
Compatible with desktop, ipad and android browsers.
Last updated on 17/04/2019 19:28 by Matthieu Guenebaud
No content available
Ubuntu installation guide:
First, the Java virtual machine must be installed on the server. Launch the following command line:
sudo aptitude install openjdk-8-jreIf it is not already done, the installation will start automatically.
Then, the Tomcat 7 application server must be installed on the server. Launch the command below:
sudo aptitude install tomcat7 tomcat7-admin tomcat7-docs tomcat7-examplesA Tomcat 7 user with administrator rights is needed to proceed to deployments. To add one, edit the file:
sudo vi /var/lib/tomcat7/conf/tomcat-users.xmland replace its content by this one (do not forget to change LOGIN and PASSWORD with proper values):
<tomcat-users>
<role rolename="manager-gui"/>
<role rolename="manager-jmx"/>
<role rolename="manager-status"/>
<role rolename="manager-script"/>
<user username="LOGIN" password="PASSWORD" roles="manager-gui,manager-jmx,manager-status,manager-script"/>
</tomcat-users>Tomcat 7 memory must be tweaked for better performances. The following file must be edited:
sudo vi /etc/init.d/tomcat7Replace the line
JAVA_OPTS="-Djava.awt.headless=true -Xmx128M"with this one
JAVA_OPTS="-Djava.awt.headless=true -Xmx1024M"Now, we need to create a folder to store the log files from the application:
sudo mkdir /home/guenmattools
sudo chown -R tomcat7:tomcat7 /home/guenmattoolsThen, the database must be installed and configured. But first, we need to add the MySQL JDBC connector into Tomcat, by copying it in the folder /usr/share/tomcat7/lib/. It can be downloaded at this address:
http://www.mysql.com/downloads/connector/j/
The name should be mysql-connector-java-5.1.20-bin.jar.
The MySQL database must be installed. Launch the commands below:
sudo aptitude install mysql-serverIn order to check if everything works fine, launch the following command and check for the answer "started".
sudo service mysql statusThen configure the database by editing the file:
sudo vi /etc/mysql/my.cnfAdd or replace these lines at the end:
max_allowed_packet=50M
character-set-server=utf8
skip-character-set-client-handshakeThe database must be restarted in order to work as intended:
sudo service mysql restartThen, the application database must be created:
mysql -u root -p
CREATE DATABASE camerasWith a proper user:
grant all on cameras.* to 'login'@'localhost' identified by 'password';If the server is headless, a font needs to be installed manually:
sudo aptitude install ttf-dejavuThen prepare the search engine indexation storage folder with:
sudo1 mkdir -p /var/lucene/indexes
sudo chown -R tomcat7:tomcat7 /var/luceneTomcat can now be restarted:
sudo service tomcat7 restartFinally, we need to deploy the application into tomcat by using the previously downloaded file and Tomcat manager which is available at the address http://www.yourserver.com:8080/manager. To authenticate, use the previous LOGIN and PASSWORD values.
Rename the application war file previously downloaded with the name ##INSTALL_FILE##.
And finally, reach the Deploy panel at the bottom, pick the war file for the option "WAR file to deploy", and click on the button "Deploy" (the process can take some time).
In order to access the application, click on the application name in the list to be redirected to the main page on the site.