06/07/2009


Status


Last updated on 03/10/2017 22:25 by Matthieu Guenebaud
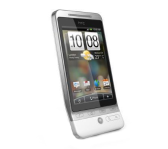
Current configuration

Android : 2.3.7 build GWK74

Radio : 63.18.55.06PU_6.35.15.11

Kernel : 2.6.37.6-cyanogenmod-g0799e00

Firmware : CyanogenMod-7.2.0-RC1-passion

Launcher : ADW 1.3.6 System CM 1.1

Install android SDK on Windows XP

Download android SDL latest version at:

Uncompress the file in the following folder

C:\Program Files\android-sdk-windows.

The right click on the workspace icon on the desktop and click on properties.

Go to the advanced panel, and click on "environments variables".

In the system variables, edit the "Path" variable to add:

;C:\Program Files\android-sdk-windows\tools

(remember to add a ; if there are other paths declared).

Save and close.

Connect the photo to Windows XP

Activate USB debug in phone menu "Settings":

Settings -> Applications -> USB debug

The connect the phone to Windows XP using the following drivers:

CyanogenMod recovery 1.4 (first step)

Download the file modacopatchedrecovery-1.0 at:

Uncrompress the file at

C:\Android

The open a console and enter:

cd C:\Android
adb shell reboot bootloader (attendez que l'appareil redémarre sur le bootloader et affiche FASTBOOT USB)
fastboot boot cm-hero-recovery.img

Then enter the following commands:

adb shell mount /sdcard
adb push cm-hero-recovery.img /sdcard/cm-hero-recovery.img
adb shell flash_image recovery /sdcard/cm-hero-recovery.img

Finally, start the phone in recovery mode by pressing at the same time Home and power when the phone is starting.

Amon Ra v1.6.2 recovery installation (second step)

The following steps can be done only when CyanogenMod 1.4 is working properly.

Download the file recovery-RA-hero-v1.6.2.img at:

Then copy the file on the phone SD card root folder.

Reboot the phone in recovery (press Home and Power at the same time on startup).

Connect the phone to the computer with a USB cable, and enter in a console:

adb shell
cd sdcard
flash_image recovery recovery-RA-hero-v1.6.2.img

Restart the phone.

Nandroid backup

The Nandroid backup allows to completely back the phone (internal data and system). Only the SD card content will not be included.

Start the phone in recovery mode and launch the backup using:

Backup/Restore -- Nand backup

or

Backup/Restore -- Nand + ext backup if app2sd is activated

The backup file will be stored in a folder named "nandroid" at the root of the SD card.

Copy this file on the computer thanks to the recovery menu:

USB-MS
Backup data and applications

Download the Titanium backup application on Google play.

Launch the application, wait for the scan to be complete, and click on:

Menu -> Batch processing -> Backup all user applications

Once the backup is over, copy the files from the TitaniumBackup folder located at the SD card root.

Format the SD card and activate app2SD

App2SD allows the phone os to store all applications on the SD card, and by doing so avoid to fill the internal memory.

In the phone recovery mode:

Partition sdcard -- Partition SD

Chooose 32Mo for swap, 384 or 526 for applications (ext), and the rest as normal storage.

Be careful, all the phone SD card data will be erased.

Custom ROM installation

Two ROMs are to my opinion worthy of testing:

The first one is close to the official ROM, and can be downloaded here:

Select the rom "r5 with additions with radio image" in order to also update the radio.

Else, the VanillaEclair ROM is a basic ROM well optimized but without HTCSense. It can be downloaded at:

Choose "VanillaEclair 4.0 NAS @ 691/176".

Just copy the downloaded file to the SD card root folder.

Then, start the phone recovery mode (press HOME on startup) and launch the following commands to wipe the existing system and data:

Wipe -- Wipe data/factory reset
Wipe -- Wipe Dalvik-cache
Wipe -- Wipe SD:ext partition
Wipe -- Wipe battery stats (only if the battery level is at 100%)

Then apply the new ROM with:

Flash zip from sdcard

and select the ROM file. Wait for the end, and then restart:

Reboot system now
Configure Virgin mobile network (APN)

On the phone, go to:

Menu -- Settings -- Network -- Network settings -- Access points

The list must contains Orange Internet, Orange World and Orange SMS

Create a new APN with the following values:

Name : Virgin GPRS
APN : ofnew.fr
Proxy : 192.168.10.100
Port : 8080
User name : orange
PAssword : orange
Name : default
Keep the others default values.

Save then select the new APN

If MMS are not working, then use the following settings:

MMSC : http://mms.orange.fr
Proxy MMS : 192.168.010.200
Port MMS : 8080
Restore applications with titanium backup

On first boot, wait for Google to synchronize and download all your applications.

The launch Titanium Backup, wait for the scan to be over and then go to:

Menu -> Batch processing -> Restore mising applications with data

The process can take a little time.

Restore a Nandroid backup

Start the phone Amon Ra recovery mode (press HOME on startup).

Then launch a complete restore with the menu:

Backup/Restore -- Nand restore

Click on the backup file.